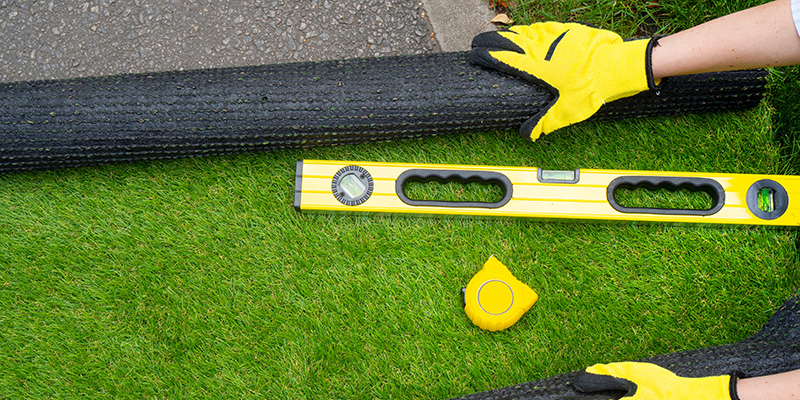
Want To Switch To Artificial Grass? Here’s How To Do It
One thing that makes HOA communities look beautiful is the presence of lush greenery in common areas, particularly large grassy spaces. But, maintaining real grass can be a headache, not to mention expensive. As such, many self-managed associations are making the switch to artificial grass.
Browse By Category
Sign up for Our Newsletter

Sign up for Our Newsletter
Trending Now
One thing that makes HOA communities look beautiful is the presence of lush greenery in common areas, particularly large grassy spaces. But, maintaining real grass can be a headache, not to mention expensive. As such, many self-managed associations are making the switch to artificial grass.
Why Should You Make the Switch to Artificial Grass?
In HOA communities, there are many common areas where you will find grass. Grass adds to the appeal of a neighborhood and, when properly taken care of, can make an entire space look immaculate. But, whether it’s a huge lawn or a small turf, self-managed boards know how hard it is to maintain grass. If you’re looking for a good alternative, here are the benefits of switching to artificial grass.
1. Appealing Year-Round
It’s difficult enough to maintain natural grass on good days, let alone during harsh weather conditions. The great thing about artificial grass is that it looks absolutely gorgeous all year round. You can’t match the striking green color of synthetic grass, and there are even many shades of green to choose from. And, contrary to popular belief, artificial grass is not hard. In fact, many manufacturers have nearly mimicked the soft appearance of grass.
2. Low Maintenance
Natural grass is high maintenance. It requires constant watering, mowing, weeding, and fertilizing. Plus, natural grass can grow to become uneven because of people stepping on it. This will require you to replace patches of grass every now and then. In contrast, artificial grass is low maintenance. Since it’s fake, it doesn’t need any of the care that real grass does.
3. Cost-Efficient
Synthetic grass can also be cost-efficient. Because it requires little to no maintenance, you don’t have to spend money on the usual tools, products, and labor that you normally would when maintaining real grass. For a self-managed association, this means having more room in the budget for other expenses.
4. Long-Lasting
You don’t need to be a genius to know that artificial grass is durable. Bad weather and heavy foot traffic won’t wear down your synthetic lawn. In fact, most artificial grass products are specifically designed for heavy foot traffic. This means you can look forward to a long-lasting turf.
5. Sustainable
Many artificial grass products are made with recycled materials, making them an eco-friendly option. Additionally, without constant watering, you can conserve water and save money on utilities. If you want a sustainable way to keep your common areas looking great, synthetic grass is the way to go.
6. Non-Toxic
Synthetic grass products are non-toxic and pesticide-free. In comparison, natural grass may require pesticides, and not all grass species are safe for people and animals. With artificial grass, you can be sure that it’s safe for kids and pets alike. It also minimizes the risk of allergies caused by pollen and chemicals.
7. Good for Any Location
A huge benefit of artificial grass is that it’s made for various terrain and weather conditions. There’s an artificial grass product for any location — be it muddy areas, rocky terrain, or steep slopes. It is particularly great for areas that often experience drought or have land that’s unfriendly to plant growth.
How to Switch to Artificial Grass
Self-managed associations can hire a professional landscaping company to install artificial grass in common areas. But, a DIY approach is also entirely possible. Here are the steps involved in the process.
1. Remove the Grass
The first step is to remove the grass. It is best to remove at least a few inches of the existing base. You will need to do this by section so that it is much easier to handle. Depending on how much sod or soil there is, you may need a dump trailer on site for this step. If you end up with good-quality sod, you may be able to sell it. On the other hand, for soil that you need to dispose of, make sure to check your local city’s regulations.
2. Prepare the Base
After removing the existing grass, you need to prepare the base. Measure out the area to understand how much artificial turf will be needed. Then, you need to loosen any hard spots on the ground and level them out.
Next comes the padding. You will need to lay out rubber pellets or crushed stones over the entire space. A good standard is to use a class 2-road base, which is a mixture of rock and sand. It’s also recommended to use a weed barrier. This will prevent any vegetation growth under the artificial turf. The base should be a bit damp so that you can run a compactor over it to get a smooth surface where you will lay down the turf.
3. Lay Down the Turf
After setting a base, gently roll out your synthetic grass over the entire area, making sure not to disturb the base. Let the turf sit out under the sun for about an hour. This will allow it to expand to its actual size. Turf usually comes in rolls, and you will likely use more than one. As such, see to it that you lay down each roll the same way, with the blades of grass facing the same direction. Make any adjustments necessary to cover all the spaces.
4. Cut to Fit
Unless the rolls of synthetic grass perfectly match the size of the area, you will likely need to trim it. A carpet cutter works well in this scenario, though you can also use a razor knife. When cutting artificial grass, start from the back where you can see the stitch rows. Leave about half an inch of turf over the edge of the border.
Then, you can secure the seams using turf glue or tape. Allow the glue to dry for 15 minutes. Make sure to wear gloves during this process to avoid injury. Knee guards also come in handy, as you will be kneeling on the grass for long periods of time.
5. Secure the Grass
While turf glue or tape secures the seams, the artificial grass itself will still need to be affixed to the ground. Tuck the half-inch edge into the order using a hammer and a metal putty knife. Break up the blades of grass and use turf nails or staples to fasten the grass. It should go through the backing and into the ground. Do this every 6 inches on the outside perimeter of the turf and every 2 feet inside.
6. Spread and Brush Infill
The final step is to spread and brush infill. This is what will make your artificial grass truly stand out in both appearance and durability. There are several types of infill you can choose from, though you should go with the one recommended by the manufacturer. Make sure to spread the infill evenly throughout. Then, take a stiff bristled broom to brush the turf. This will keep the blades vertical so that the grass always looks like it has been freshly mowed.
The Obvious Choice
Artificial grass is low maintenance, durable, and sustainable, making it the perfect choice for HOAs that are looking to minimize vendor services and conserve water. And although you can certainly take a DIY approach to the process, it does take a lot of work. Thus, you should consider hiring a landscaping company to help you switch to artificial grass.
RELATED ARTICLES:
- 10 Effective Ways Your HOA Saves Money
- Hiring The Best HOA Landscaping Companies
- 5 HOA Maintenance Plans You Must Have
Trending Now
Related Article


Sign up for Our Monthly Newsletter
Sign up below for monthly updates on all HOA Resource